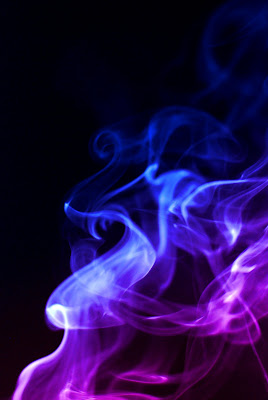
I had wanted to get the information up sooner on how to create this.... something about a house full of boys slows me down sometimes.
So... here we go!
-
I have a candle set on the table. One with a nice large wick works best, giving a longer time to take pictures before the smoke blows out. Side Note: I'm going to town tomorrow to find an incense stick to see it's results.
-
I did this at night with the lights off. On the side place a light, desk lamp, flashlight, just some sort of light source to illuminate the smoke. Behind the candle place something black. I happened to have a large sheet of black board. Maybe you have a dark blanket, a skirt, just something black for a background.
-
I used my 50mm lens. I used all manual settings.
ISO 400
Shutter 1/80
f/2.2
WB Auto
-
I realize not everyone has a big aperture like the one I used. Just get creative with you settings and maybe get more light on your smoke to help you out with that.
-
Do NOT use a flash. I thought I would try it and it illuminates the background too much.
-
Set you focus to Manual Focus. Focus on the area to have it ready. Nothing like taking out of focus pictures.... *points at self*
-
Once you have your pictures it's time to edit.
-
First thing I did was go to levels and bring in each level to the middle, lightening the lights and darkening the background.
-
Now click back on your background picture. Duplicate it by pressing Ctrl J. Then change the blending mode to Overlay
-
Now click on your Gradient Tool. Next choose your foreground and background colors to what you would like.
-
Go to your picture and drag the Gradient Tool in whichever way you want the colors to go. I know, clear as mud. Just experiment with the colors at this point.
-
Please let me know if this isn't clear enough and I will try to clear anything up for you.
-
NOW GO TRY IT!!!!!!!
 So this picture was a total experiment. I was board out of my mind - and we were sitting along side the road, my hubby was on the phone and we'd already been there closer to two hours. Just to have a phone conversation. Obviously it is a windshield the hat is reflecting off of.
 Now to get more of a crisp intention look, I selected the hat using the quick selection tool. I love the refine edges option - once you have most or just what you don't want to be adjusted selected, lets move on to our repair. Up in the categories at the top of you photo shop window hit select, go down to inverse (4th down on my photo shop) Use the eye dropper tool, to select a color from your photo which you wish to make your corrections with. Now, working with the paint brush tool -soft round 200 pxl- paint or spray over areas you wish to be less obvious in you new reflection.


