 I am going to start with a sunset photograph, that has decent coloration but not perfect.Notice how the foreground has significant detail, but nothing of interest really.The foreground distracts from the colors of the sunset and would be less distracting if a silhouette.The sky coloration is good, but it is not super amazing and can use a little help to make the colors more vivid.There are many ways we can silhouette the foreground, and I will show you my preferred method that still retains some foreground detail and doesn’t look like we just painted a blob over the foreground. First we start by duplicating the background layer. ( Layers-New-From Background-Multiply with 100% Opacity)
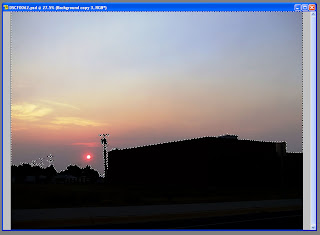 Now on the new layer we will delete the sky from the layer so we are only darkening the foreground.This is quickly done using the wand selection tool and selecting the lighter background, once everything is selected than ctrl-x to cut the selection from the layer. Quick side note:It can be tricky to leave the highlights on the objects, but that is crucial to maintain an appearance of realism to the foreground objects; look at the transformers on the power pull and notice the highlights that still remain.
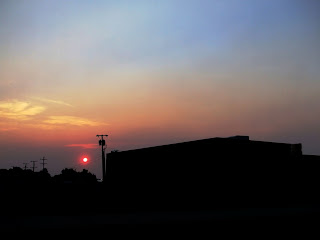 Now that we have successfully darkened the foreground, we can still see some detail but maybe we want to darken it a little more…This is easily accomplished by copying the foreground darkening layer one more time.Now we are starting to get somewhere.Now it is time to work on the coloration; during the first background layer copy I liked what the multiplying of the background layer did for the sky coloring so I am going to copy the background layer again and multiply the entire layer with opacity of 60%.This will amplify the sky colors and darken the foreground a little more.
We have turned the foreground into a silhouette and have pretty much left the sky untouched; now let’s accentuate the coloration of the sky.This will be done by using a gradient fill on a layer that is mostly transparent, using a color that we want to accent.Adding a semi-transparent layer is similar to using a lens filter on a camera, the difference being we use the color that we want to accent instead of the inverse of the color we want to accent.
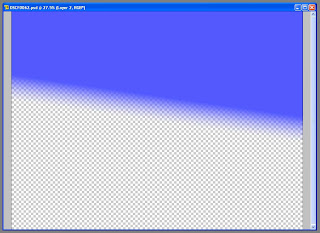 Lets start with the blue.Create a new layer that is a soft light and about 50% transparent.Using a blue foreground color lets do a single color gradient to transparent in the upper portion of the layer. We want the blue gradient to stop before the sky colors start becoming orangish-yellow.Once you have the blue layer done, lets add another one that is red, same process but we want the red layer to cover the bottom half of the photo.
 Ultimately you will want some natural sky coloring between the two layers so don’t worry about matching up the gradients perfectly.
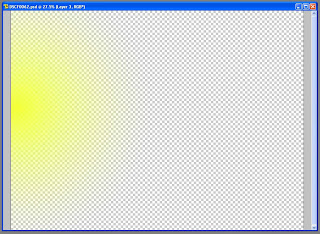 This process has subdued the yellow, so now let’s bring some of the yellow back.One the yellow layer we will use a circular gradient that centers on the edge of the photography in the transition zone from red to blue.This will add a yellow flare to the photograph.
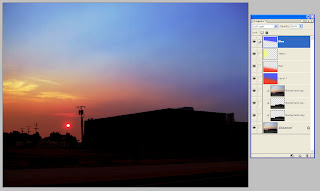 Now that we have our color filter layers we can play with their individual opacity properties to adjust the coloring.REMEMBER, we are embellishing the natural colors of the photograph NOT completely changing them; so cautious that the colors are not over accentuated and made to look fake or surrealistic.
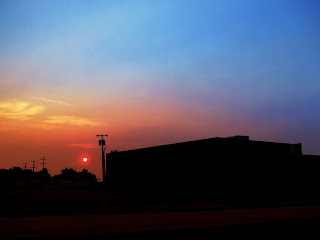 Now that we have arrived at our desired outcome, let’s see how much each layer has changed the photograph.Clicking on the eye symbol under the layer properties will hide a given layer, this should demonstrate what effect each layer is having. Colors might be a little vivid and bold in the final picture, but it shows how drastically we can change the coloration of a picture.
7 comments:
Thanks for a great tutorial. I have always struggled on using the gradient tool. Here is my chance to give it another try. I always like what people come up with using the tool, it's just that I don't always do a good job with it. Ah, gettting out of my comfort zone - just what I need!
I will work with that this week and post something. I can't wait to see what others post as well!
Also, I like the way you just brought out more of the colors without making the picture look fake, good work!
Carl,
I have been enjoying the tutorials on here and find it pretty amazing the things that you all are doing with the camera computer combination.
I remember a couple of wildlife photgraphers that I knew used to take animals from the taxidermist out and put them strategic places and take pictures. That to me is cheating, enhancing the coloration is not cheating.
Keep up the good work!
lineman
Thanks for the encouragement and kind words; I do enjoy pushing the limits of photography and have been amazed at what can be done on the computer. It is as much a challenge to keep the picture looking real as it is to visualize the picture through the lens, and in the end there is a picture worth putting a name on, almost every time.
Have fun and I look forward to seeing what everyone comes up with...
Great post Carl! Lots of thought and good detail, but not overdone. I'm looking forward to sunset so I can get some material to start modifying...
Cy
Okay, remember I said I'm not good with the gradient tool.... I'm working on this currently and I'm struggling with that tool. I like the multiply effect but unless I figure out the gradient I'm likely to go to my other techniques.
Anyone got some help on the way the gradient tool works. Sorry, this is about one of my worst areas in photoshop. Thanks for the help in advance.
oh yes, I'm using Elements 6
Maybe I'm struggling because there are lots of clouds?
Post a Comment